How I Made My Linux PC Insanely Productive
A clean-looking desktop with dark themes and a floating dock is great, but aesthetics alone don't write code, compile firmware, or keep you in flow state during a 12-hour engineering sprint.
When software engineers and power users switch from macOS to Linux, they usually love the command line power and raw hardware performance. What catches them off guard is losing small, invisible everyday habits: tapping the spacebar to preview files, grabbing text from videos with OCR, infinite clipboard history, and seamless phone-to-PC clipboard sync.
1. The Spacebar Quick Look: Instant File Previews (GNOME Sushi)
On standard Linux installations, checking what's inside a file requires launching heavy applications. You double-click a multi-megabyte PDF, wait 3 seconds for Document Viewer to launch, realize it’s the wrong revision, close it, and repeat. Or you launch a full IDE just to inspect a 10-line config file.
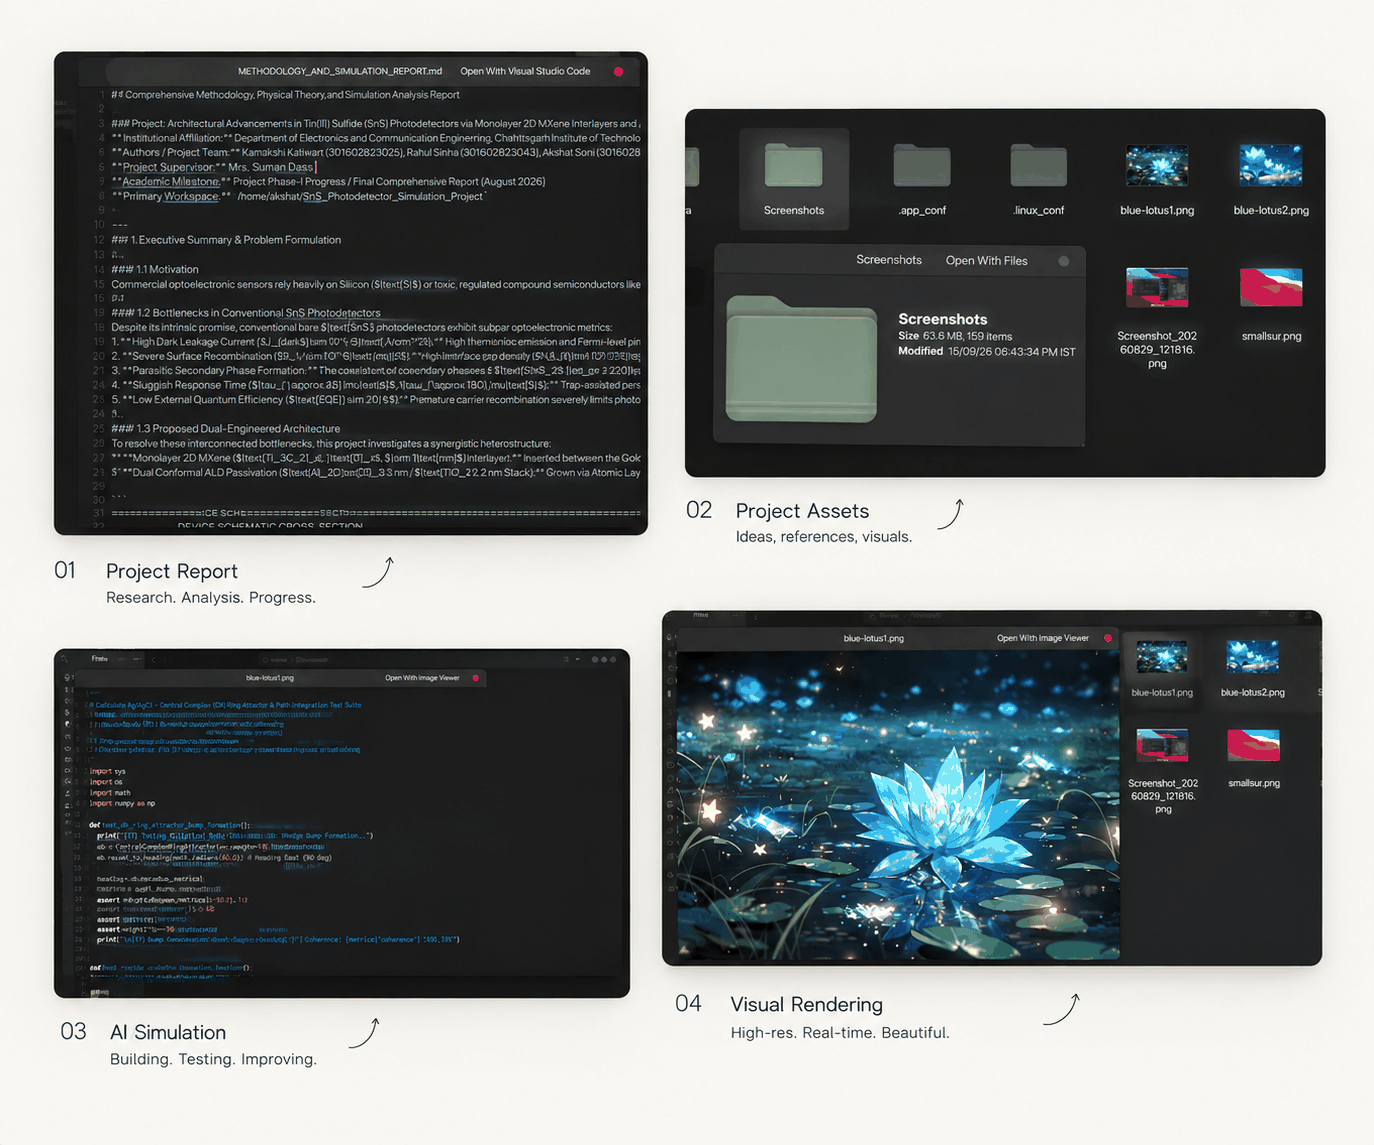
On macOS, users rely on Quick Look. On my Linux workstation, this exact capability is powered by GNOME Sushi.
In Nautilus (Files), simply select any file and tap Space. An ultra-fast hardware-accelerated preview pops up instantly. Tap Space again or Esc to dismiss it.
sudo apt update
sudo apt install -y gnome-sushi
nautilus -q # restart file manager
2. Instant Screen-to-Text OCR (SnapText)
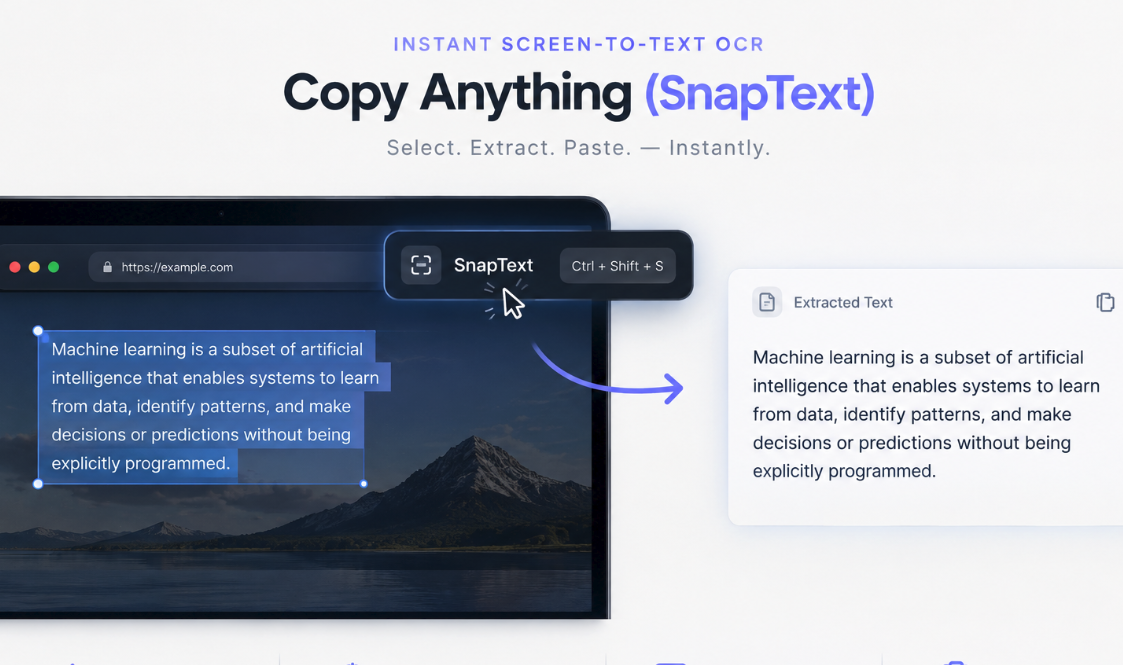
The screen is full of "uncopyable" text: error popups in modal dialogs that block text selection, code in paused YouTube videos, and architecture diagrams. Retyping long stack traces by hand is a waste of time.
With SnapText, hitting a hotkey (Ctrl + Shift + S) lets you draw a marquee box around any screen region. In 200ms, Tesseract OCR extracts the characters directly into your clipboard.
3. The Clipboard Time Machine (Clipboard Indicator)
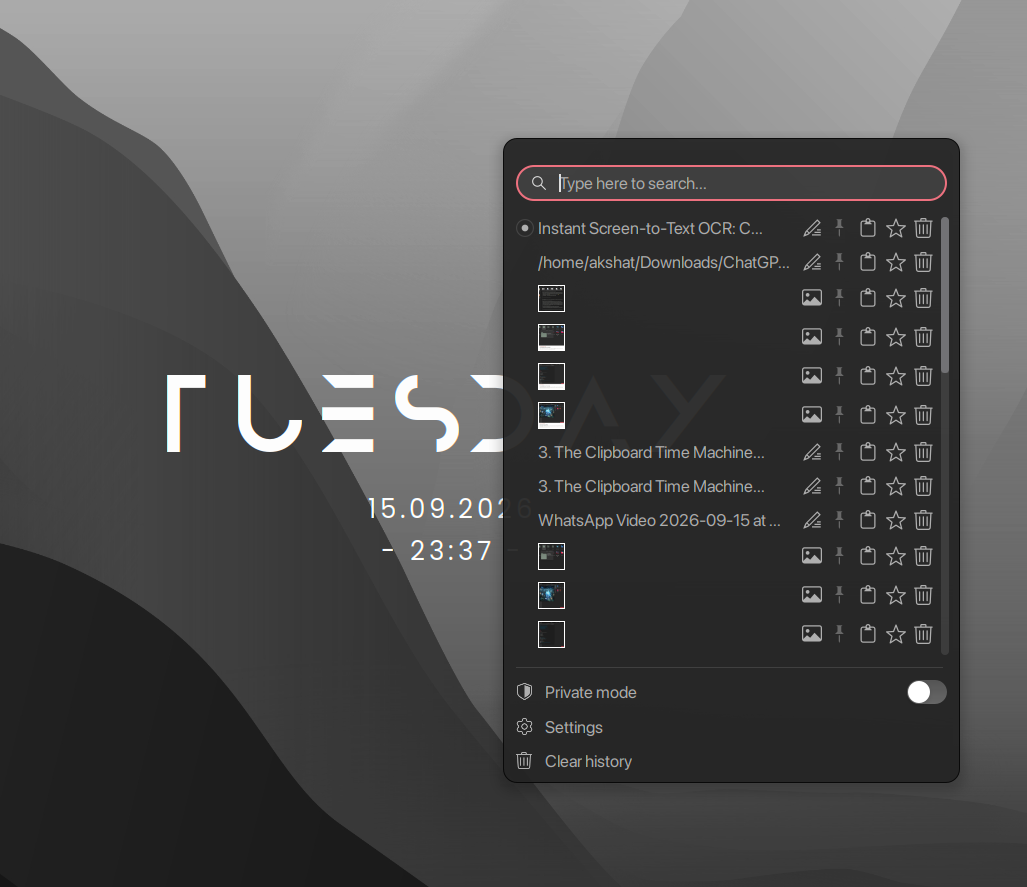
Standard OS clipboards store only one item at a time. If you copy a complex regex, switch windows, and copy an email address, your regex is erased from existence.
With Clipboard Indicator sitting in the top panel:
- Press Super + V to open a searchable menu of your last 50 clips.
- Pinned Favorites: Keep SSH public keys and standard commands pinned permanently.
- Private Mode: Temporarily suspend clipboard history when entering credentials.
4. Seamless Wireless Phone Integration (GSConnect)
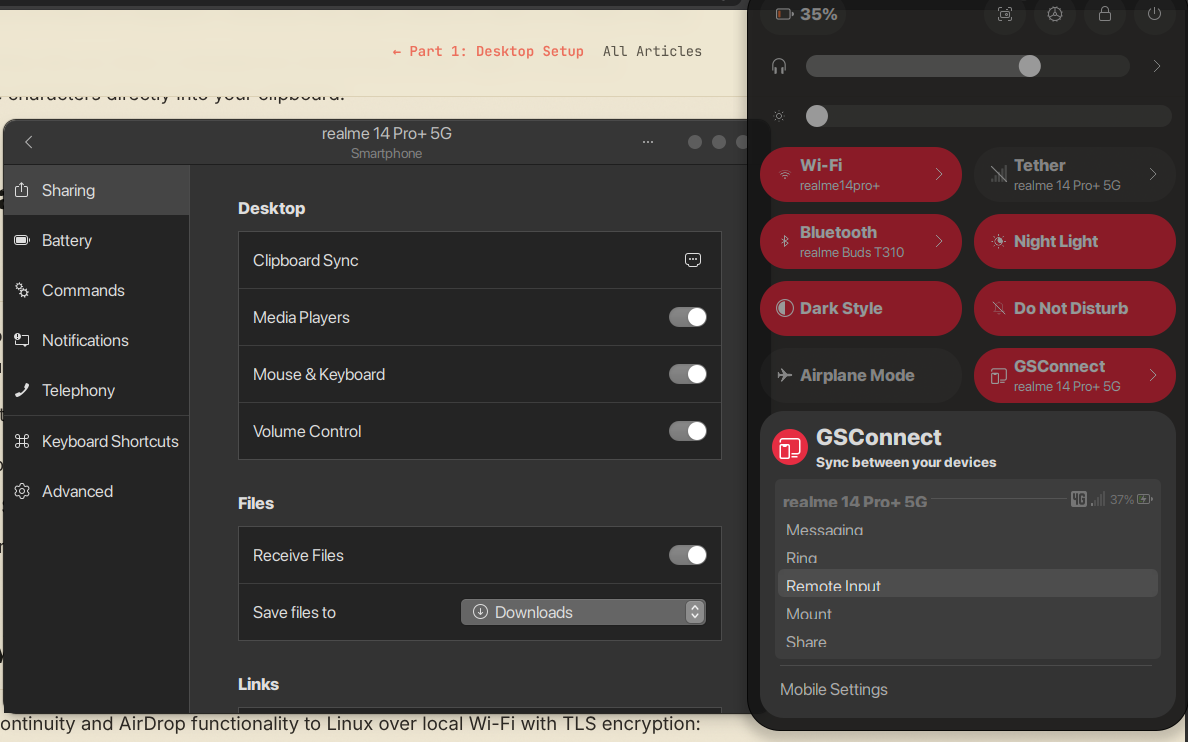
GSConnect brings Apple Continuity and AirDrop functionality to Linux over local Wi-Fi with TLS encryption:
- Unified Clipboard: Copy text or 2FA codes on your phone $\rightarrow$ press Ctrl+V directly on your desktop.
- Desktop Notifications: Read and reply to SMS/WhatsApp directly from GNOME notification banners.
- AirDrop File Drops: Right-click any file $\rightarrow$ Send to Phone with zero cloud intermediaries.
- Smart Media Pause: Incoming phone calls automatically pause PC media playback.
5. Smart Window Grids (Tiling Shell)
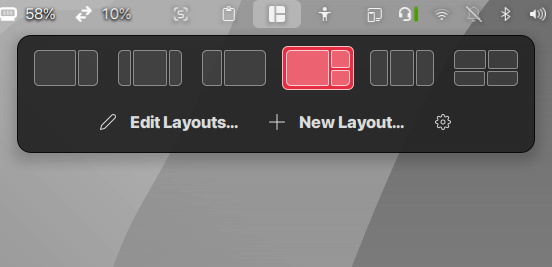
Instead of manually resizing windows or memorizing complex i3/Hyprland tiling keys, Tiling Shell brings visual snapping zones:
- Drag windows to display edges to drop them into 50/50 splits, thirds, or quad quadrants.
- 4px Aesthetic Gaps: Subtle breathing room between windows prevents eye fatigue.
- Keyboard snapping with Super + Arrow Keys for instant arrangements.
6. Distraction-Free Fullscreen with Top Bar Peeking
When coding in fullscreen or writing documentation, you want complete immersion. But you still need to check the time or battery level. With peek-top-bar-on-fullscreen, the top bar remains hidden until you bump your cursor against the top screen edge. The bar smoothly slides down, shows your indicators, and glides away automatically.
7. iPhone / Mac-Style Live Biometric Face Unlock
On cold boot or wake-from-sleep, the machine launches directly into an animated live lockscreen with video wallpaper and clock. Howdy camera scans your face in under 300ms, displaying a sleek glass badge: 🔓 Unlocked — Press any key to open. Tapping Space or swiping up smoothly enters the workspace.
8. Memory Immunity & Compiler Performance: ZRAM & Mold
The secret to keeping Linux responsive under heavy workloads:
- ZRAM + Swappiness=25: Replaces slow disk swap with ultra-fast in-memory
lz4compression, completely preventing out-of-memory desktop freezes. - Modern Linker (
mold): Links C++, Rust, and native binaries up to 10x faster than default linkers. - Variable Refresh Rate (VRR): Enabled in GNOME Mutter for stutter-free 120Hz/165Hz scrolling.
gsettings set org.gnome.mutter experimental-features "['variable-refresh-rate']"
sudo apt install -y mold ccache
Daily Muscle Memory Cheat-Sheet
| Workflow | Shortcut / Action | Under the Hood |
|---|---|---|
| Instant File Preview | Space on any file in Nautilus | gnome-sushi |
| Grab Screen Text | Custom OCR Hotkey / Tray Icon | snaptext (Tesseract) |
| Clipboard History | Super + V | clipboard-indicator |
| Phone Sync & Clipboard | Automatic Wi-Fi sync | gsconnect |
| Grid Snapping | Drag to edge / Super + Arrows | tilingshell |
| Peek Clock / Battery | Bump cursor to top screen edge | peek-top-bar-on-fullscreen |
| Face Unlock | Glance at camera $\rightarrow$ tap Space | live-lockscreen + Howdy |
Replicate This Setup on GitHub
Grab the full repository with all scripts, icons, screenshots, and configuration files ready to clone and run.